Creating Windows 10 installation media
Creating Windows 10 installation media is essential for situations where you need to restore or reset your operating system. There are several methods to create Windows 10 installation media, and here are three common ones:
Method 1: Using the Media Creation Tool
- Download the Media Creation Tool:
- Visit the official Microsoft website. Link given below.
- https://support.microsoft.com/en-us/windows/create-installation-media-for-windows-99a58364-8c02-206f-aa6f-40c3b507420d
- Run the Media Creation Tool:
- Double-click the downloaded file to run the tool.
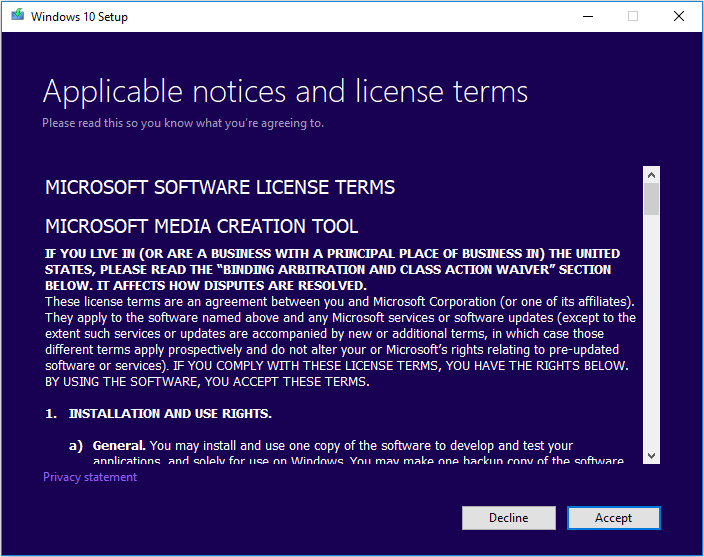
- Accept License Terms:
- Read and accept the license terms.
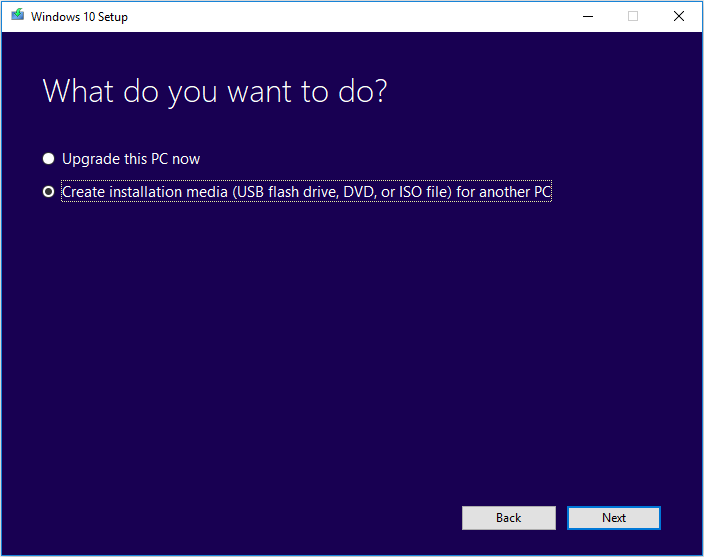
- Select “Create Installation Media for Another PC”:
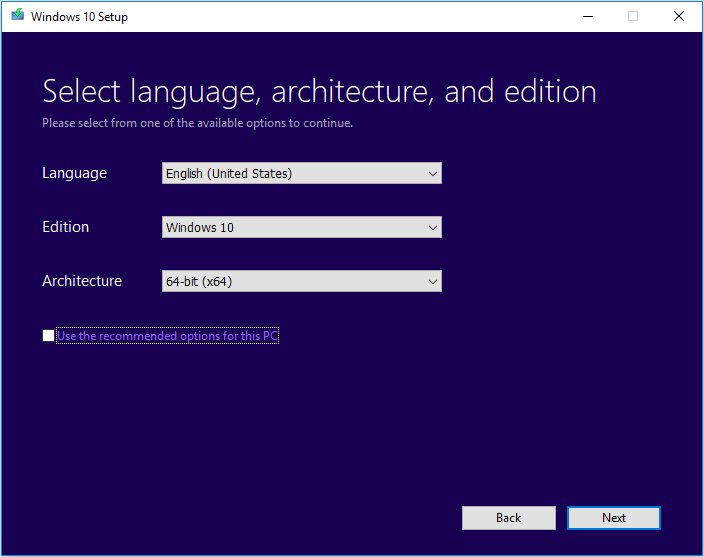
- Choose the language, edition, and architecture for Windows 10. If you’re creating media for the PC you’re currently using, leave the options selected by default
- Choose Media Type:
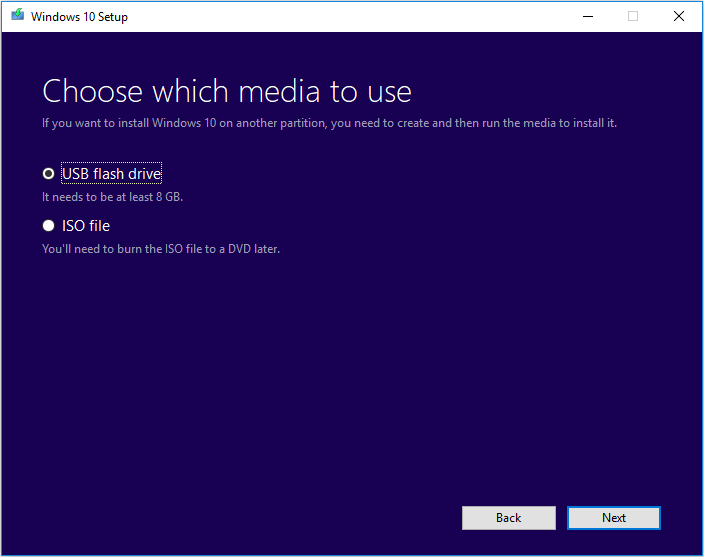
- Select “USB flash drive” to create a bootable USB drive. Alternatively, you can choose “ISO file” to create a Windows 10 ISO image that you can later burn to a DVD.
- Insert USB Drive (If Applicable) and Start Download:
- If you chose USB flash drive, insert your USB drive into the computer. Click “Next” and the tool will download the necessary files and create the installation media.
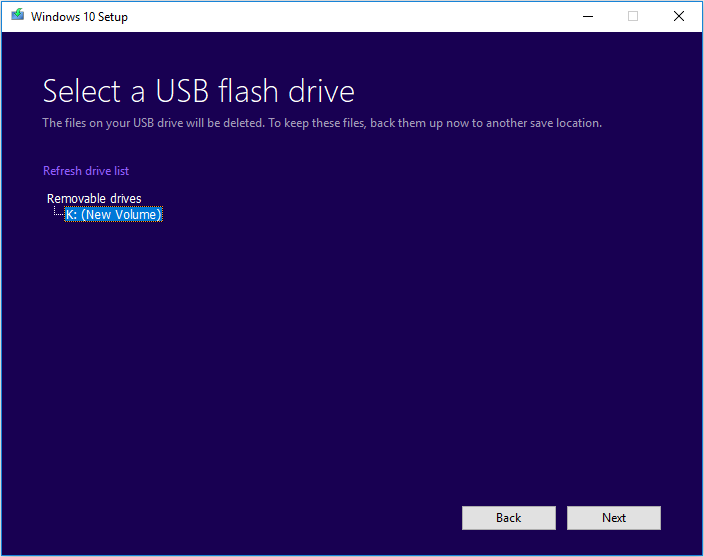
- Completion:
- Once the process is complete, you’ll have a bootable USB drive with Windows 10 installation files.
- If the computer that you want to install Windows 10 has a DVD player, you can also select ISO file to burn the ISO file to a DVD later.
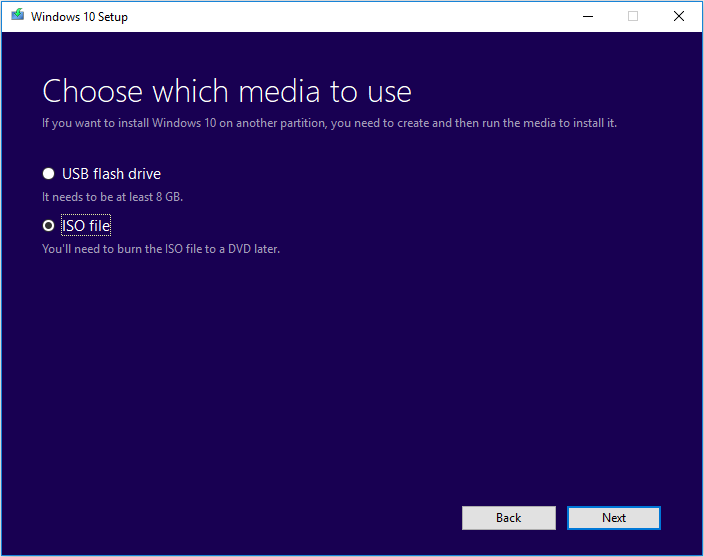
13. Just follow the step-by-step prompts on the Media Creation Tool to download Windows 10 installation files and save the ISO file to a specific location. When it is finished, you can burn the ISO file to a DVD.
Method 2: Using Rufus (For Advanced Users)
- Download Rufus: https://rufus.ie/en/
- Download Rufus, a free and open-source tool for creating bootable USB drives.
- Download Rufus, a free and open-source tool for creating bootable USB drives.
- Insert USB Drive:
- Insert your USB drive into the computer.
- Run Rufus:
- Double-click Rufus to run the program.
- Configure Rufus Settings:
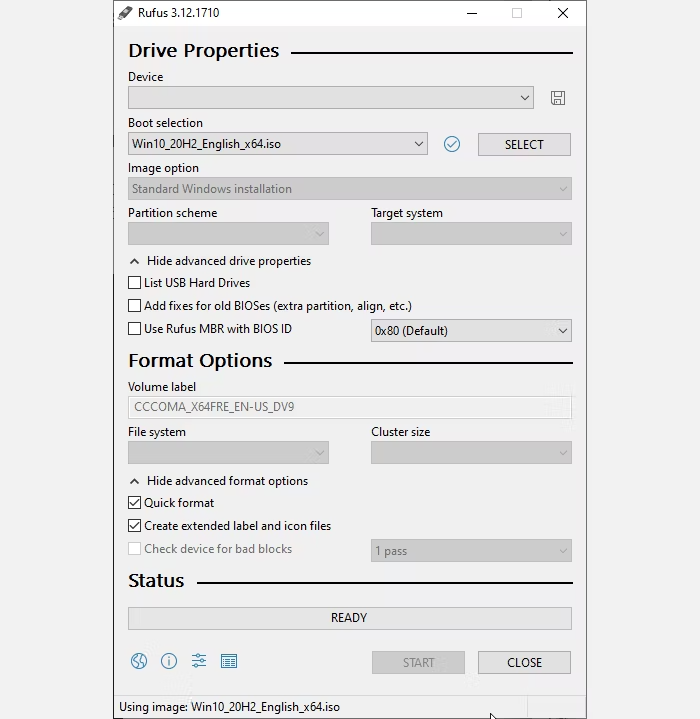
- In Rufus, select your USB drive from the device dropdown menu.
- Under “Boot selection,” click “Select” and browse to the location where you have the Windows 10 ISO file.
- Configure other settings if necessary, such as Partition Scheme and File System.
- Start Rufus:
- Click “Start” in Rufus. It will format the USB drive and make it bootable with Windows 10 installation files.
Method 3: Using Command Prompt (For Advanced Users)
- Open Command Prompt as Administrator:
- Right-click the Start menu and select “Command Prompt (Admin)”.
- Run Diskpart:
- In Command Prompt, type
diskpartand press Enter.
- In Command Prompt, type
- List Disks:
- Type
list diskand press Enter to see a list of available drives.
- Type
- Select the USB Drive:
- Type
select disk X(replace X with the number of your USB drive) and press Enter.
- Type
- Clean the USB Drive:
- Type
cleanand press Enter. This will erase all data on the USB drive.
- Type
- Create a Bootable Partition:
- Type
create partition primaryand press Enter.
- Type
- Select the Partition:
- Type
select partition 1and press Enter.
- Type
- Format the Partition:
- Type
format fs=ntfs quickand press Enter.
- Type
- Assign a Drive Letter:
- Type
assignand press Enter.
- Type
- Copy Windows 10 Files:
- Mount the Windows 10 ISO file and copy all files to the USB drive.
- Completion:
- After the file copy is complete, your USB drive is bootable with Windows 10 installation files.
Remember, creating Windows 10 installation media will erase all data on the USB drive. Make sure to back up any important files before proceeding.